Quick Start
Start Synth from licensed deployment materials, create one workspace, inspect sample Project evidence, then inspect the agent config path. Use the web app for this first pass; REST and MCP are better once you have confirmed the basic workflow.
Before You Start
You need:
- a signed Synth license;
- access to the official Synth container registry;
- either the Docker Compose POC kit or the Kubernetes/Helm values supplied for your environment;
- one approved LLM provider key, unless you are using sample mode first.
1. Start The App
Use the deployment path your Synth contact supplied.
Docker Compose POC
tar -xzf synth-acme-poc-kit.tar.gz
cd synth-acme-poc-kit

cat secrets/gcp-artifact-registry-pull-key.json | docker login us-central1-docker.pkg.dev \
  --username _json_key \
  --password-stdin

${EDITOR:-vi} values.env
docker compose --env-file values.env config --quiet
docker compose --env-file values.env up -d
Open the SYNTH_PUBLIC_URL from values.env, usually
http://127.0.0.1:8080 for a local POC.
Kubernetes / Helm
tar -xzf synth-acme-kubernetes-poc-kit.tar.gz
cd synth-acme-kubernetes-poc-kit
export SYNTH_NAMESPACE=synth-demo

kubectl create namespace "$SYNTH_NAMESPACE" --dry-run=client -o yaml | kubectl apply -f -

cat secrets/gcp-artifact-registry-pull-key.json | helm registry login us-central1-docker.pkg.dev \
  --username _json_key \
  --password-stdin

kubectl -n "$SYNTH_NAMESPACE" create secret docker-registry synth-registry-pull \
  --docker-server=us-central1-docker.pkg.dev \
  --docker-username=_json_key \
  --docker-password="$(cat secrets/gcp-artifact-registry-pull-key.json)" \
  --dry-run=client -o yaml | kubectl apply -f -

kubectl -n "$SYNTH_NAMESPACE" create secret generic synth-runtime-secrets \
  --from-literal=SYNTH_JWT_SECRET="$(openssl rand -hex 32)" \
  --from-literal=OPENAI_API_KEY="$OPENAI_API_KEY" \
  --dry-run=client -o yaml | kubectl apply -f -

kubectl -n "$SYNTH_NAMESPACE" create secret generic synth-license \
  --from-file=license-key=/secure/path/synth-license-key.txt \
  --dry-run=client -o yaml | kubectl apply -f -

helm upgrade --install synth \
  oci://us-central1-docker.pkg.dev/project-96337d0a-4d88-427b-af7/synth/charts/synth \
  --namespace "$SYNTH_NAMESPACE" \
  -f values.k8s.yaml \
  --wait \
  --timeout 10m
Open the HTTPS URL configured in values.k8s.yaml.
2. Create The First Admin
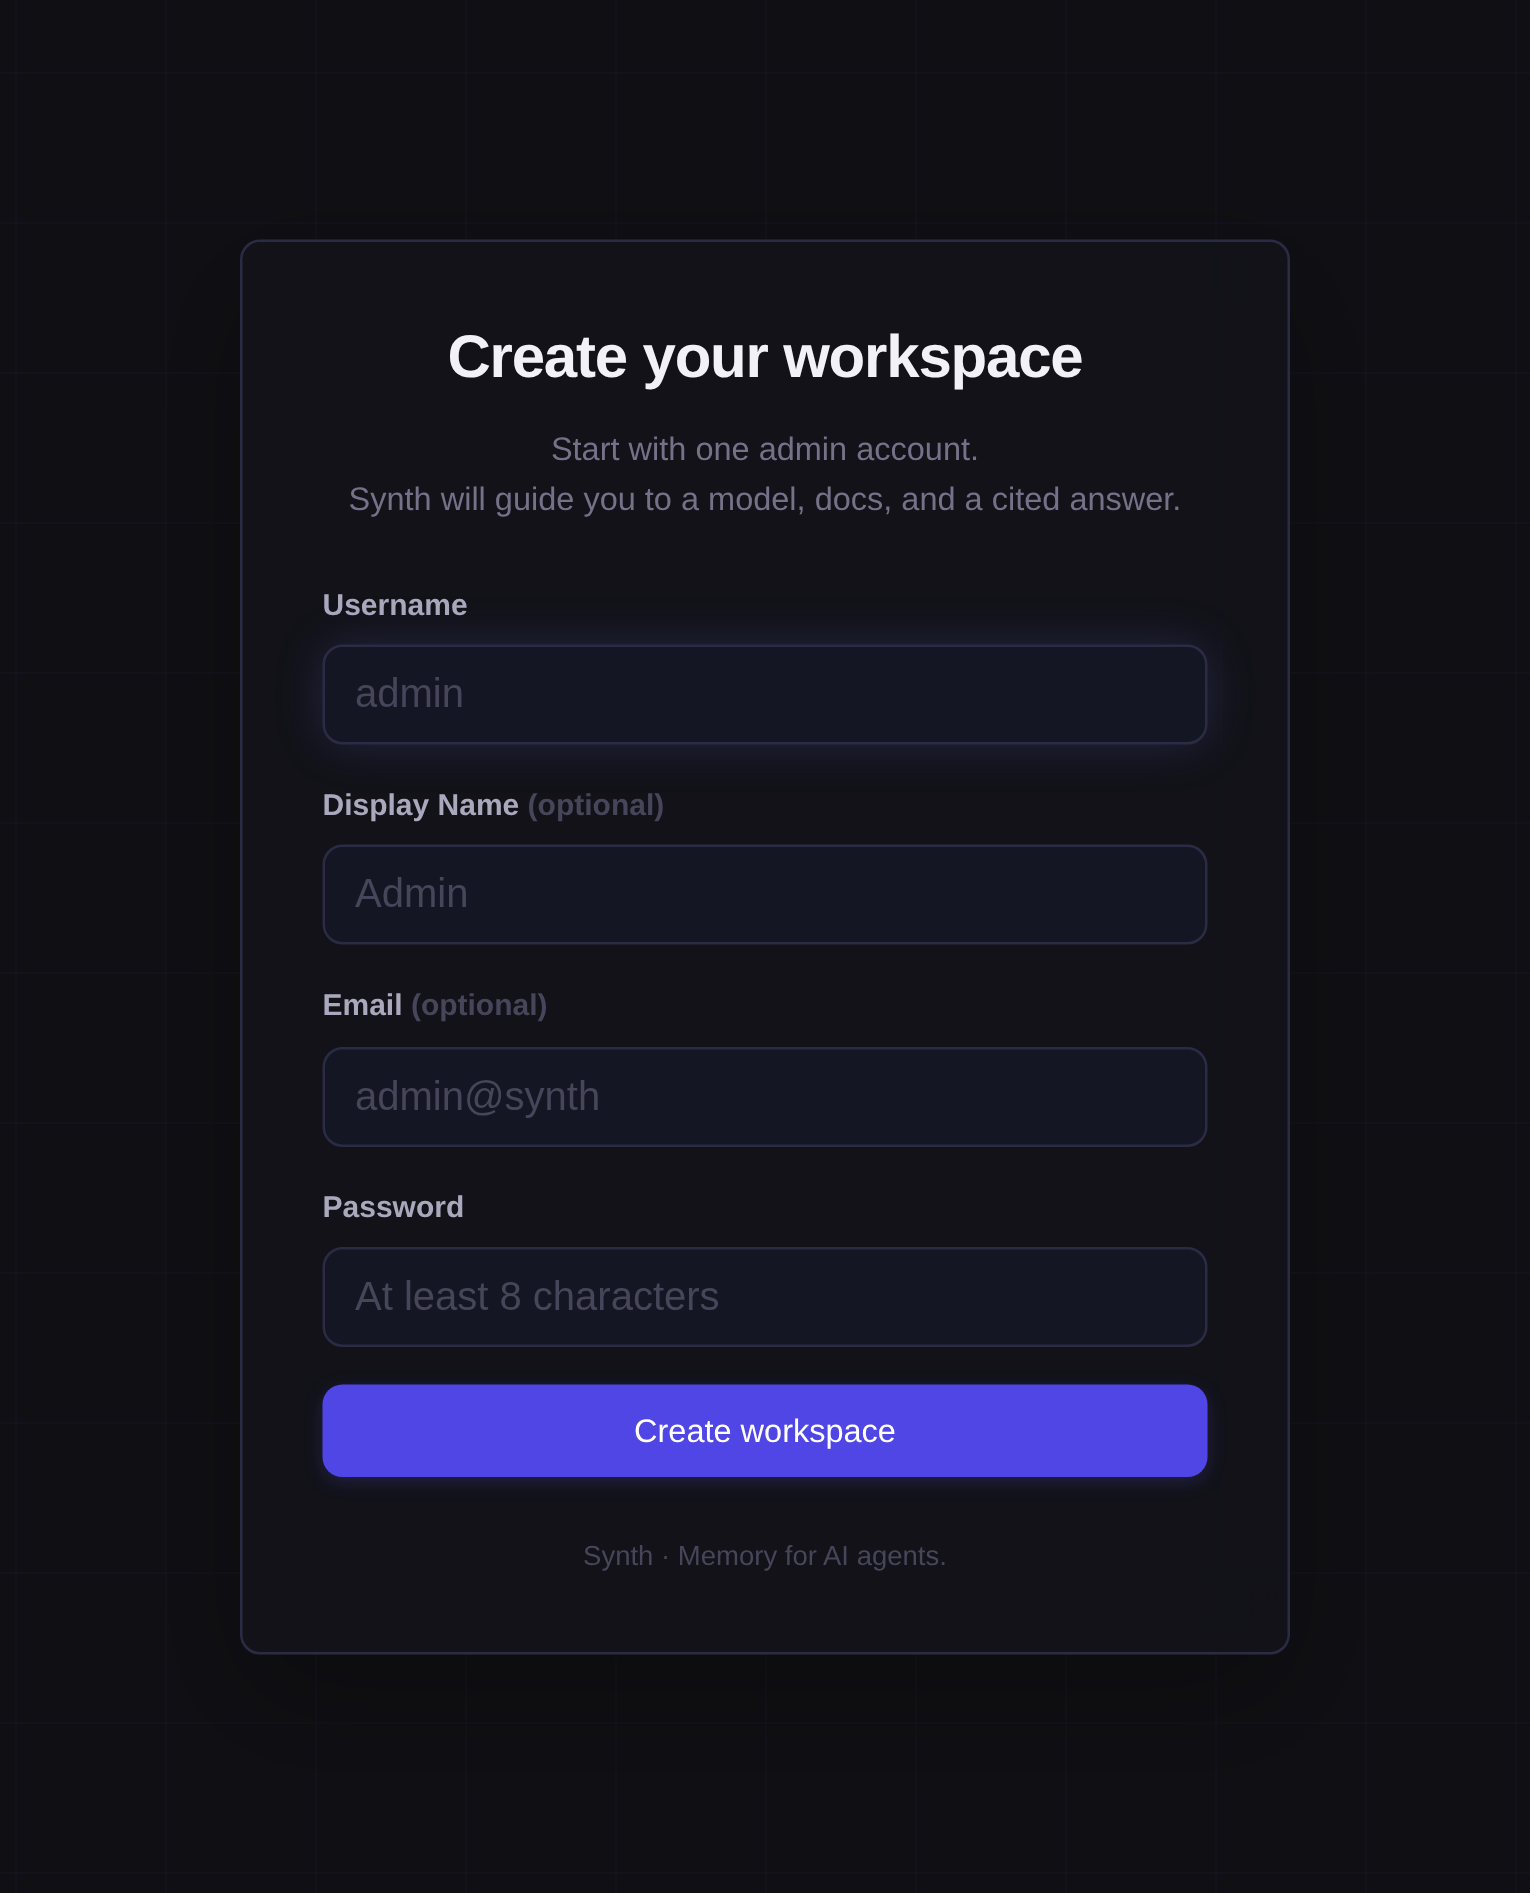
On first visit, Synth sends you to setup. Create the first admin user and sign in.
3. Choose The Fast Demo Path
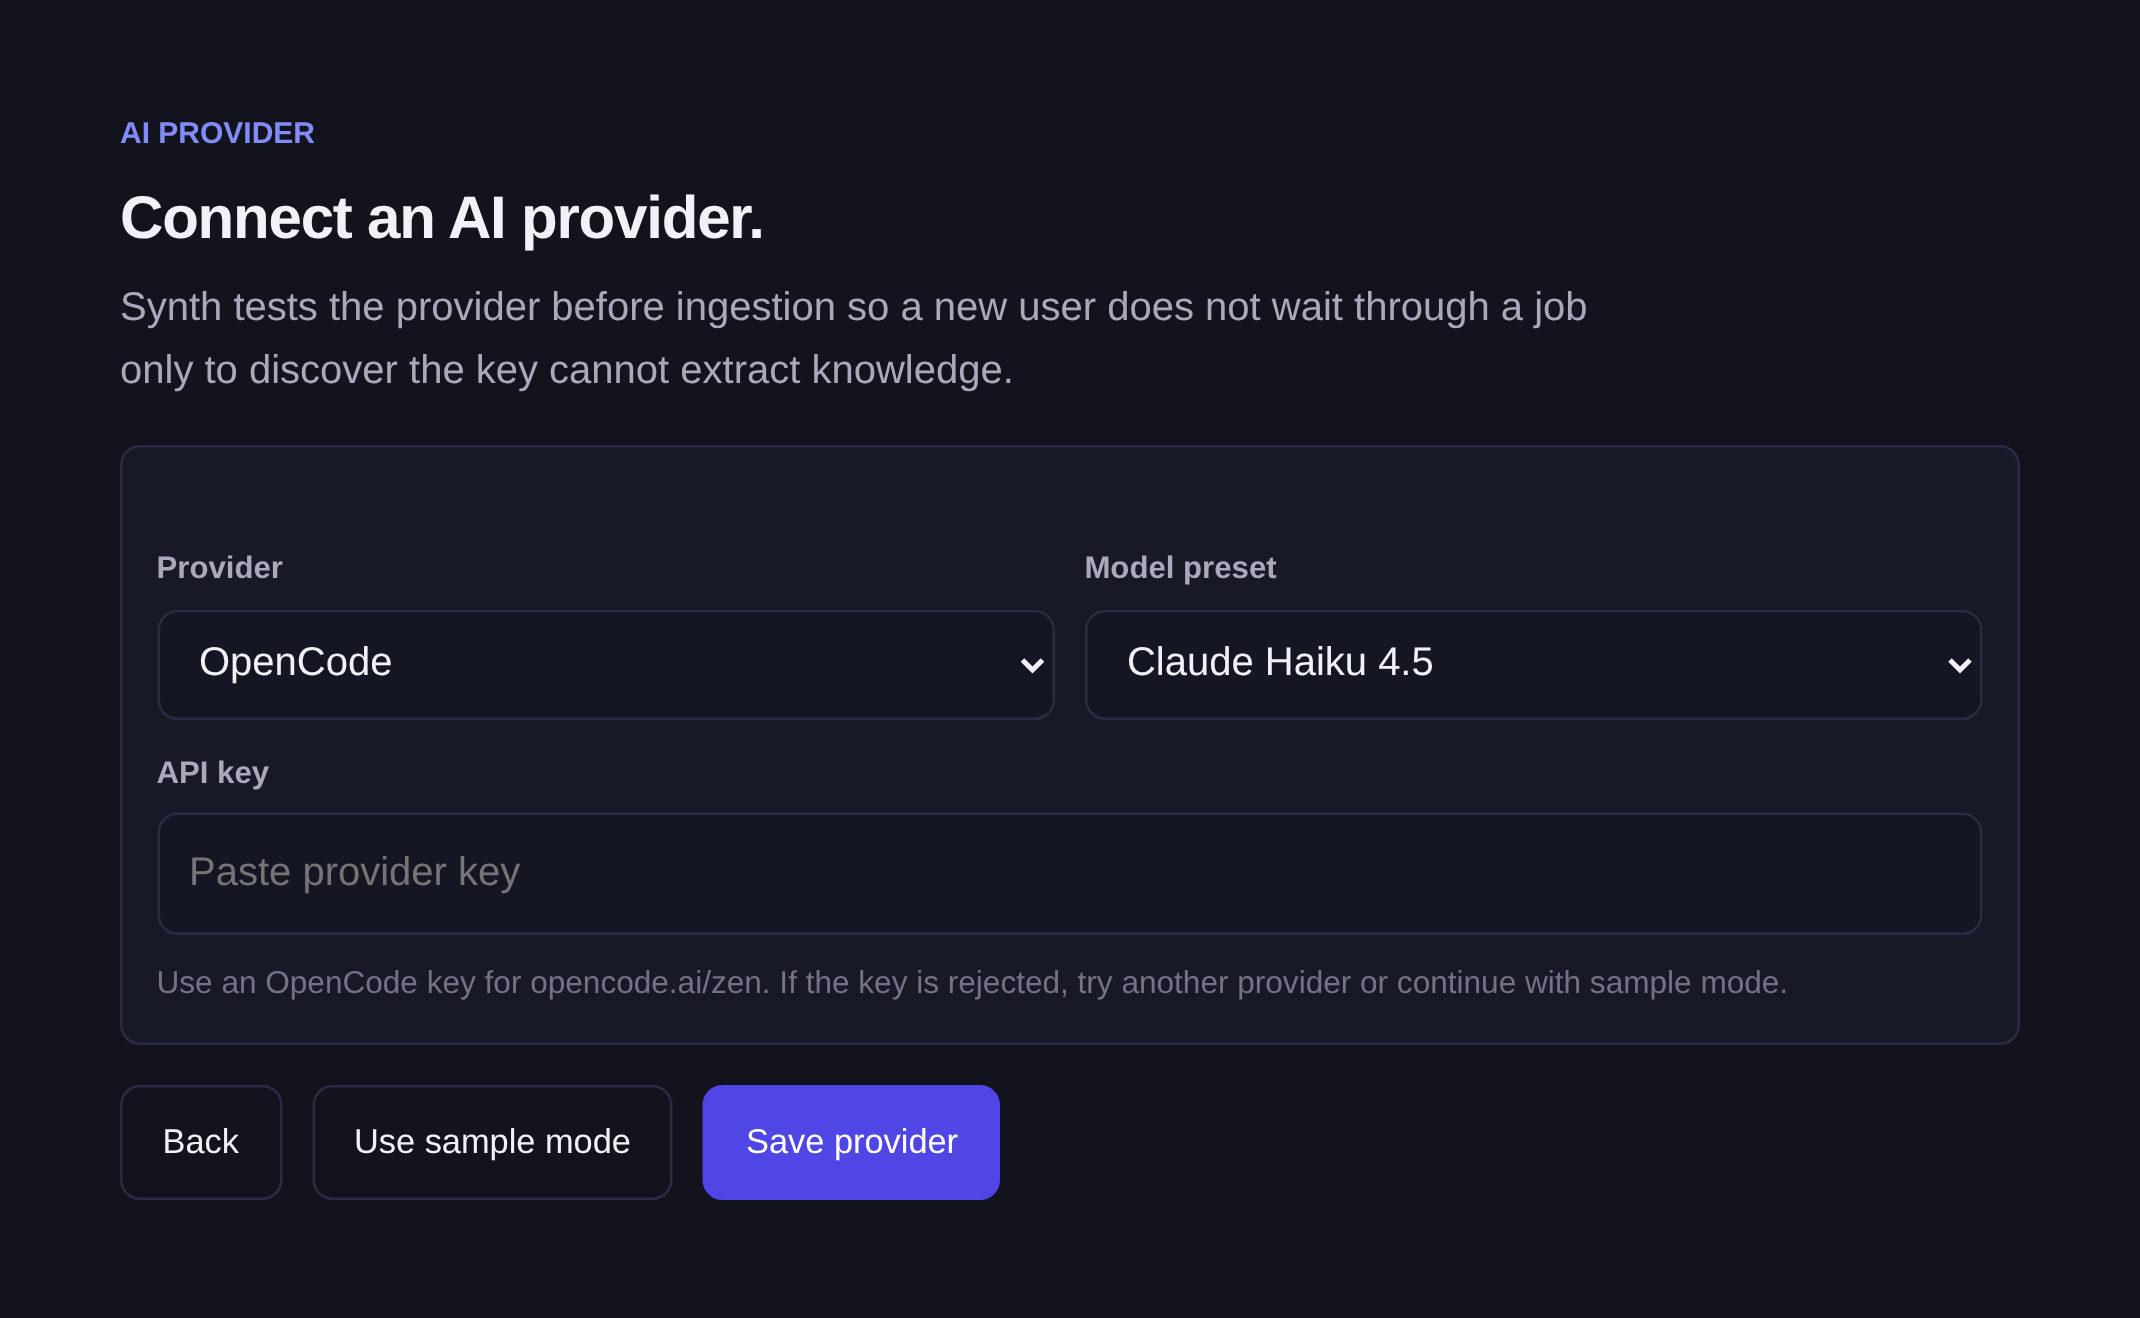
For the fastest providerless first run, choose Use sample mode in the onboarding provider step. Sample mode seeds starter docs and lets you verify the UI path without an LLM key.
4. Create A Demo KB
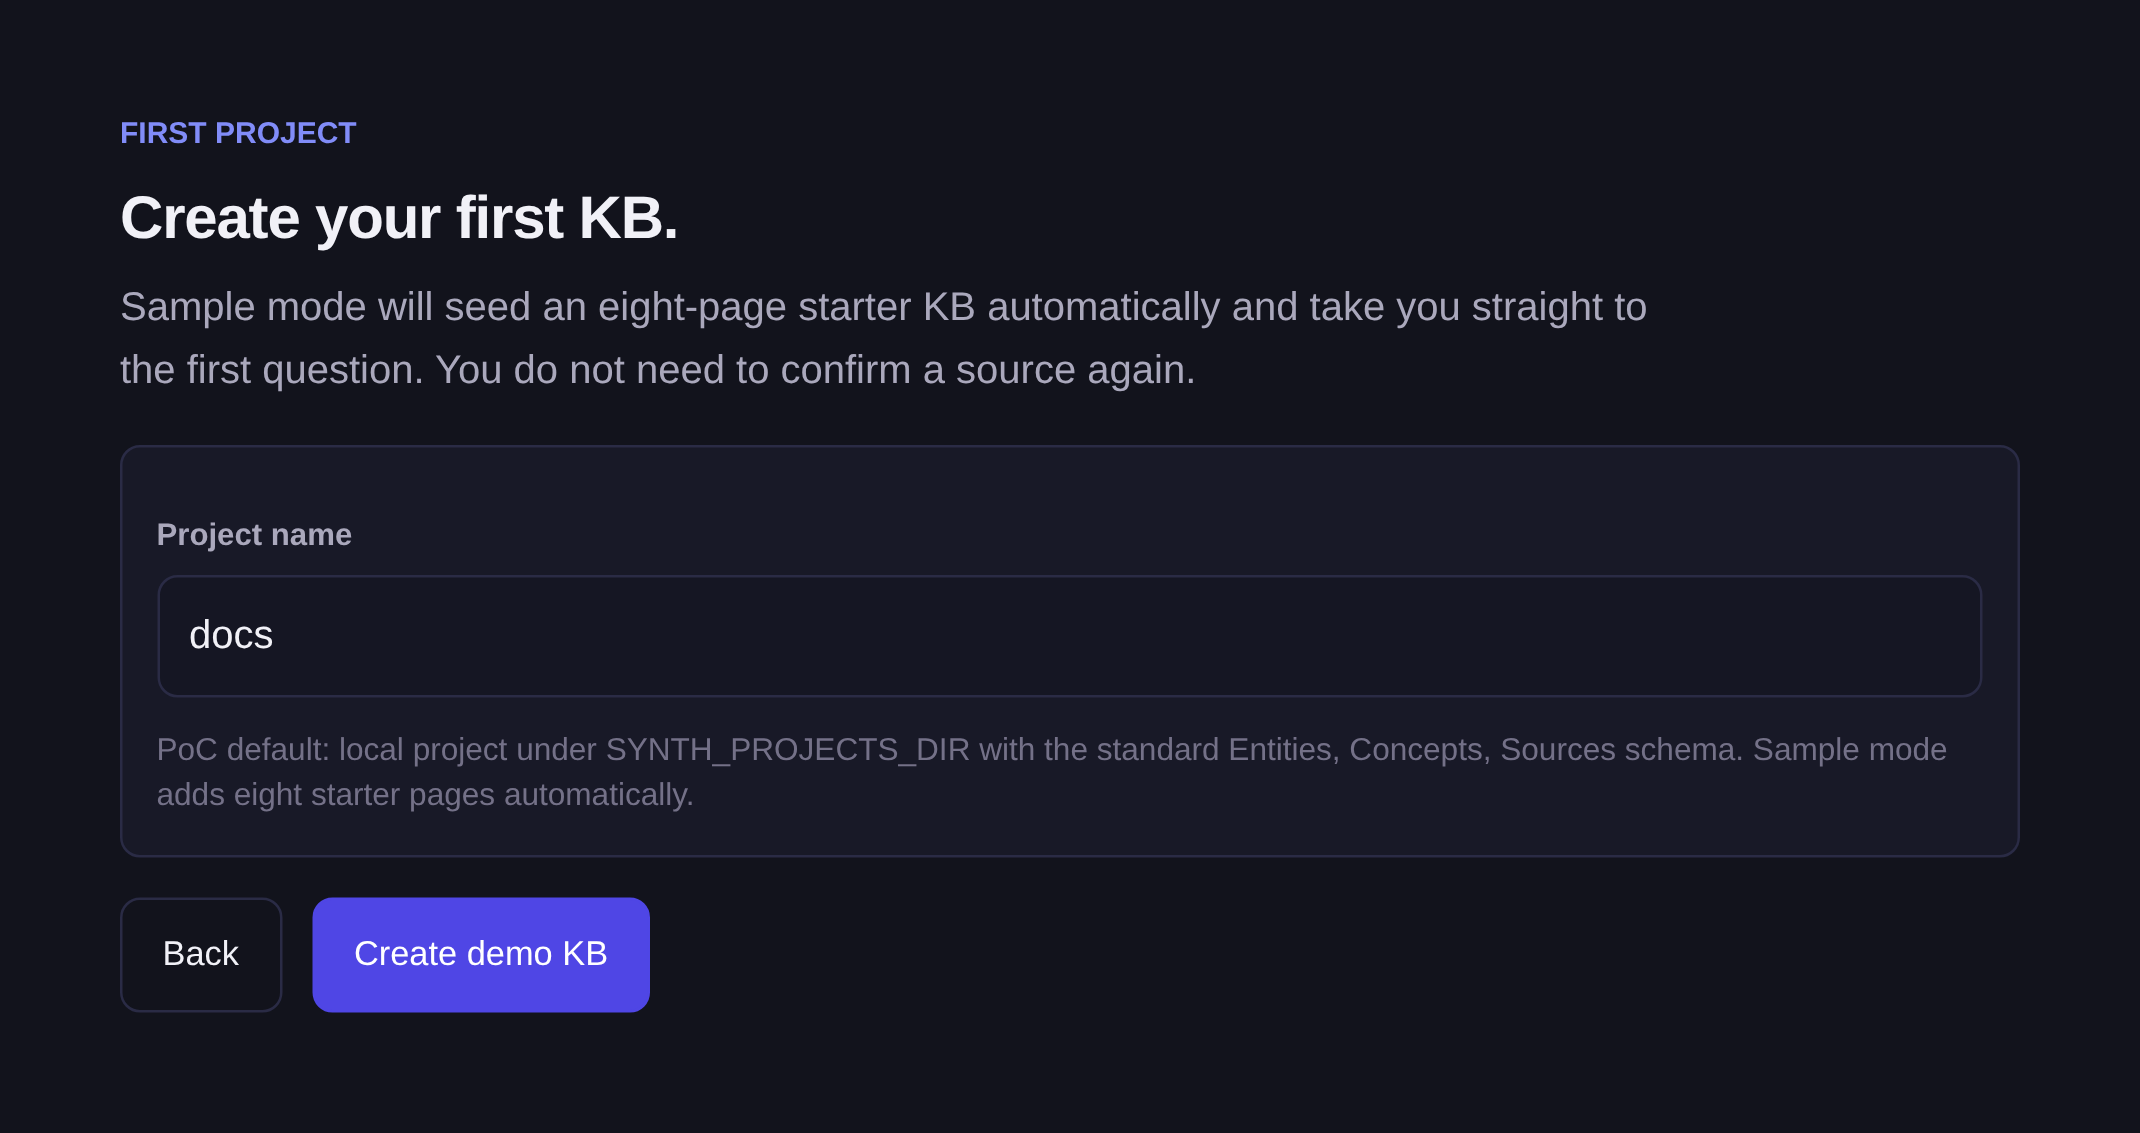
Create one demo KB. The name can be simple; this first project is just to prove the app is working end to end.
5. Explore The First Evidence
After the demo KB is ready, open Explore and enter a focused question. A successful first run shows ranked excerpts from Project knowledge. Open a card to verify its exact page revision and highlighted lines.
6. Inspect The Agent Config
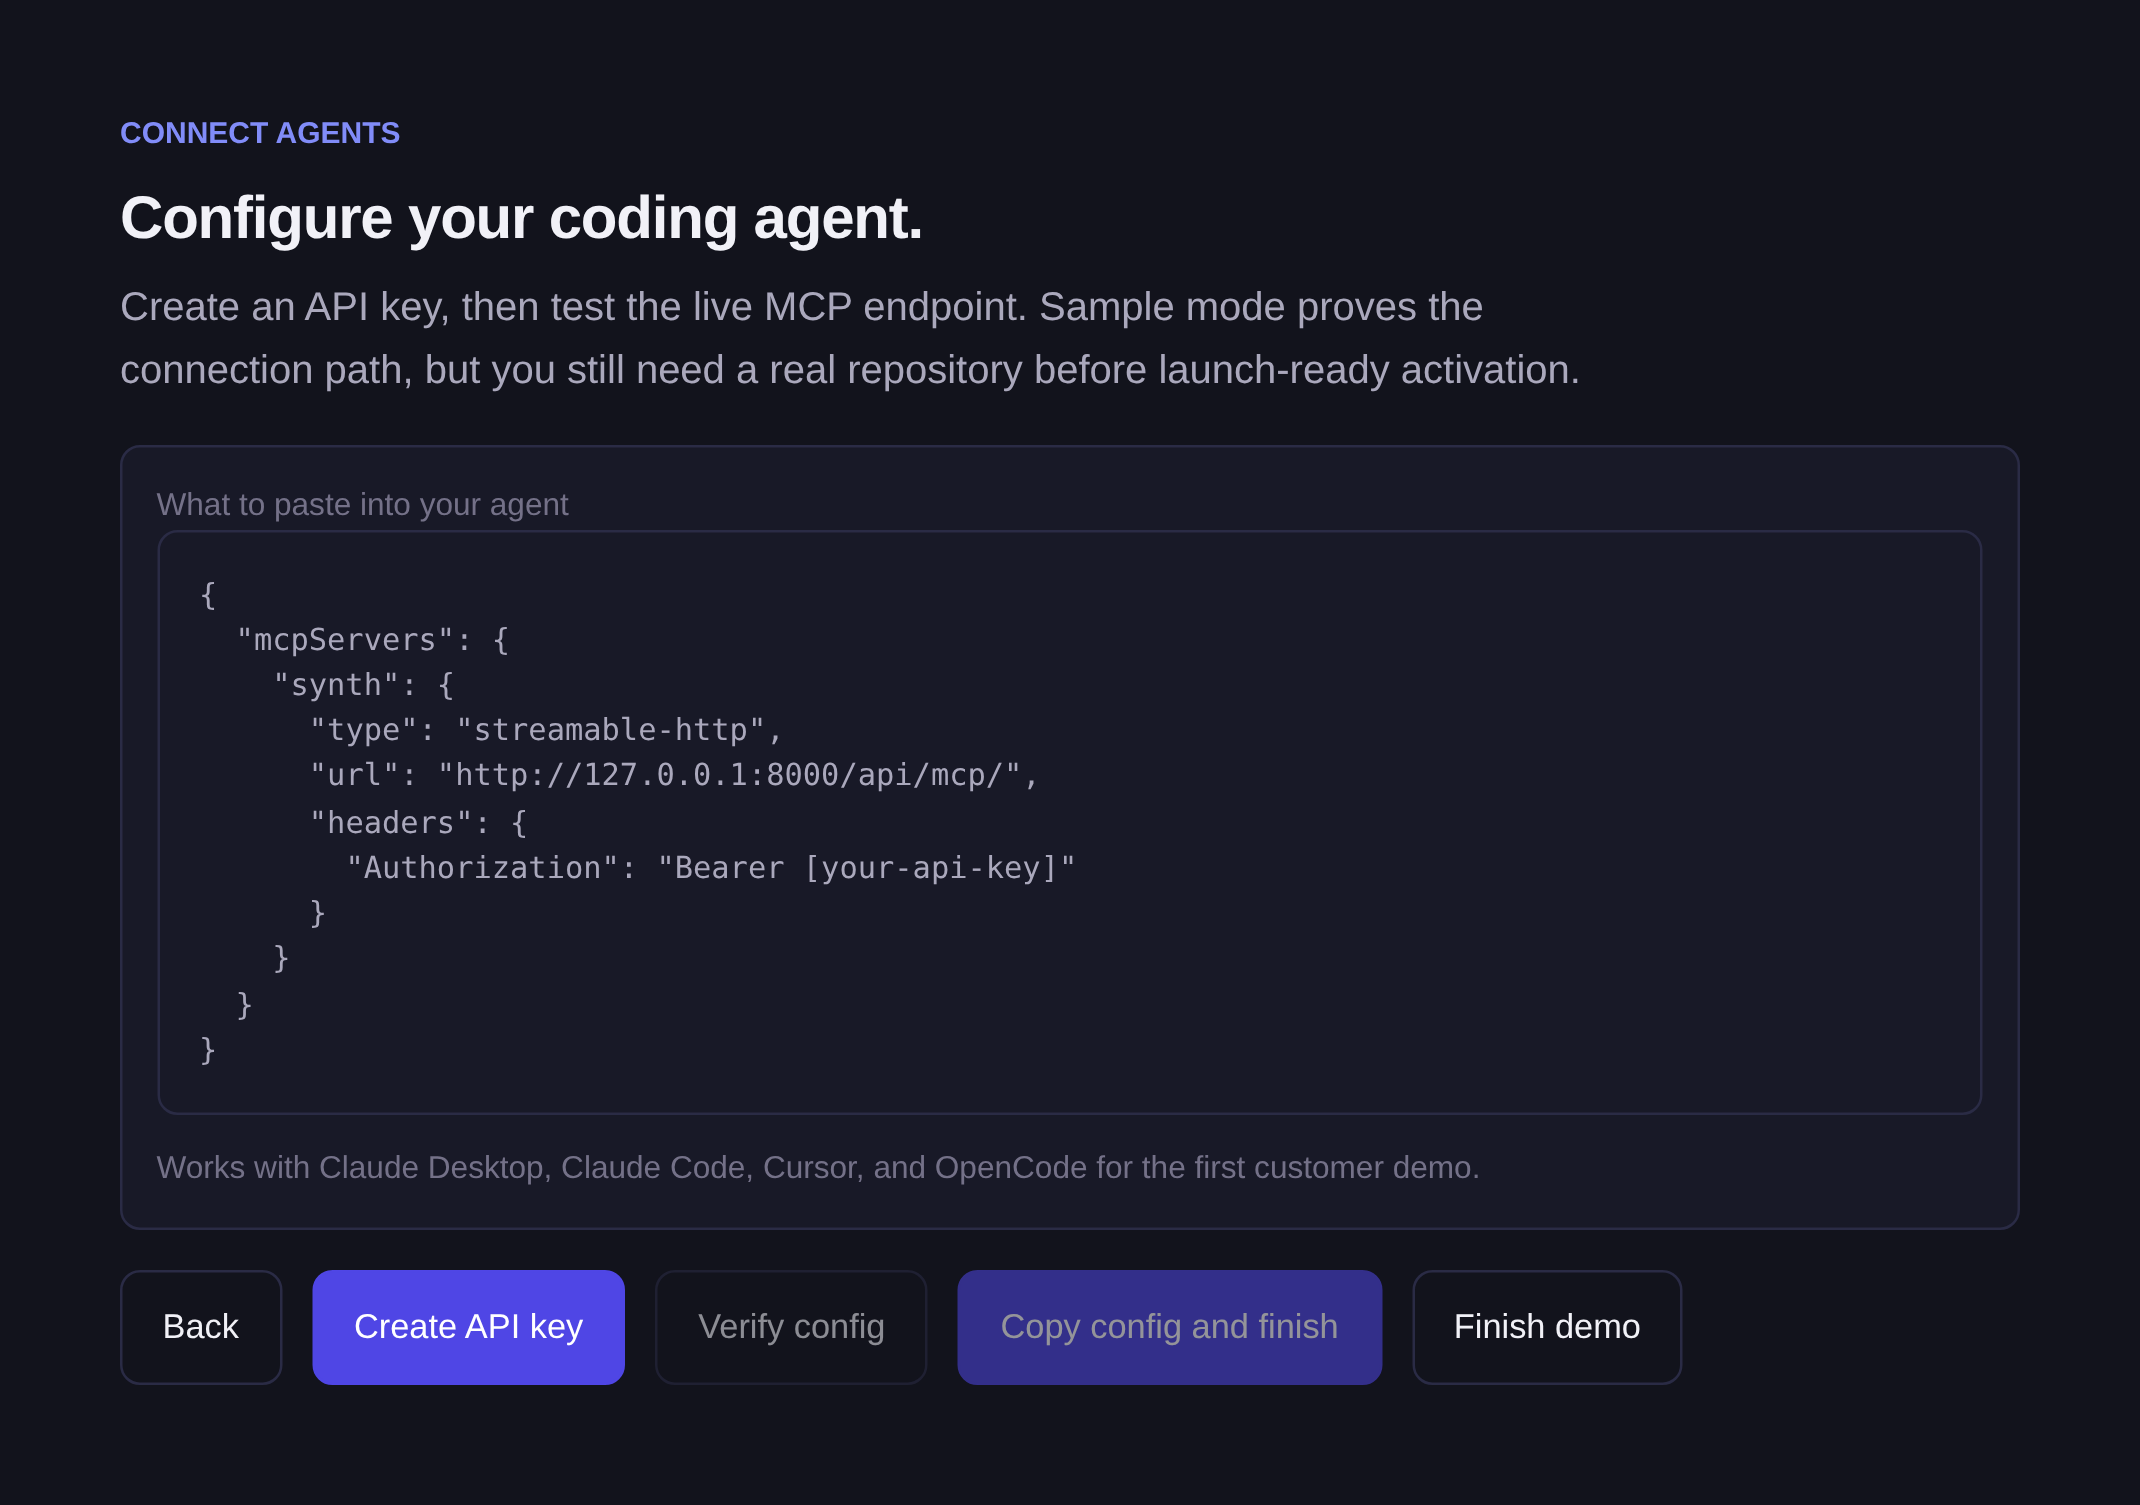
The final onboarding step shows the MCP config shape before you generate a real API key. Do not paste the placeholder token into an agent; create a scoped key after you are ready to connect a real tool.
7. Add A Provider For Optional Ingestion Intelligence
Explore and all canonical Project reads are provider-free. Add a provider only when your ingestion or lint configuration uses optional LLM intelligence.
For Docker Compose POCs, set provider keys in values.env and restart the
service:
${EDITOR:-vi} values.env
docker compose --env-file values.env up -d
For Kubernetes, store provider keys in Kubernetes Secrets and reference them
from Helm values. Do not put raw provider keys in values.k8s.yaml.
8. Add Real Knowledge
Use Ingest in the app for the easiest path once the demo flow works.
Good first sources:
- a README
- a docs URL
- a GitHub or GitLab repo
- a product spec
- a runbook or architecture note
9. Search And Copy Evidence
Open Explore and search:
What is MCP, and what should an AI agent know before using it?
Synth returns deterministic ranked evidence. Inspect an exact revision, then use Copy for agent to hand the bounded packet to your coding agent.
10. Connect Your AI Agent
Create an MCP key from onboarding or Settings, then use the public Synth URL:
{
  "mcpServers": {
    "synth": {
      "type": "http",
      "url": "https://synth.example.com/api/mcp/",
      "headers": {
        "Authorization": "Bearer synth_sk_REPLACE_ME"
      }
    }
  }
}
Then ask your agent:
Use Synth to brief this task before editing: fix the auth refresh bug.
The agent should call synth_search, inspect several results, read exact pages with synth_get_page, and answer with citations.
Use The API Later
After the web workflow works, create a scoped API key from Global Settings -> API Keys and use the REST API, SDK, or MCP tools from automation against the licensed Synth deployment URL.